Notice the word down there: SRD-05VDC-SL-C. This is a 5v DC relay which you can connect to your arduino board directly for power source to control.
12v Relay
Notice the word down there: SRD-05VDC-SL-C. This is a 5v DC relay which you can connect to your arduino board directly for power source to control.
12v Relay

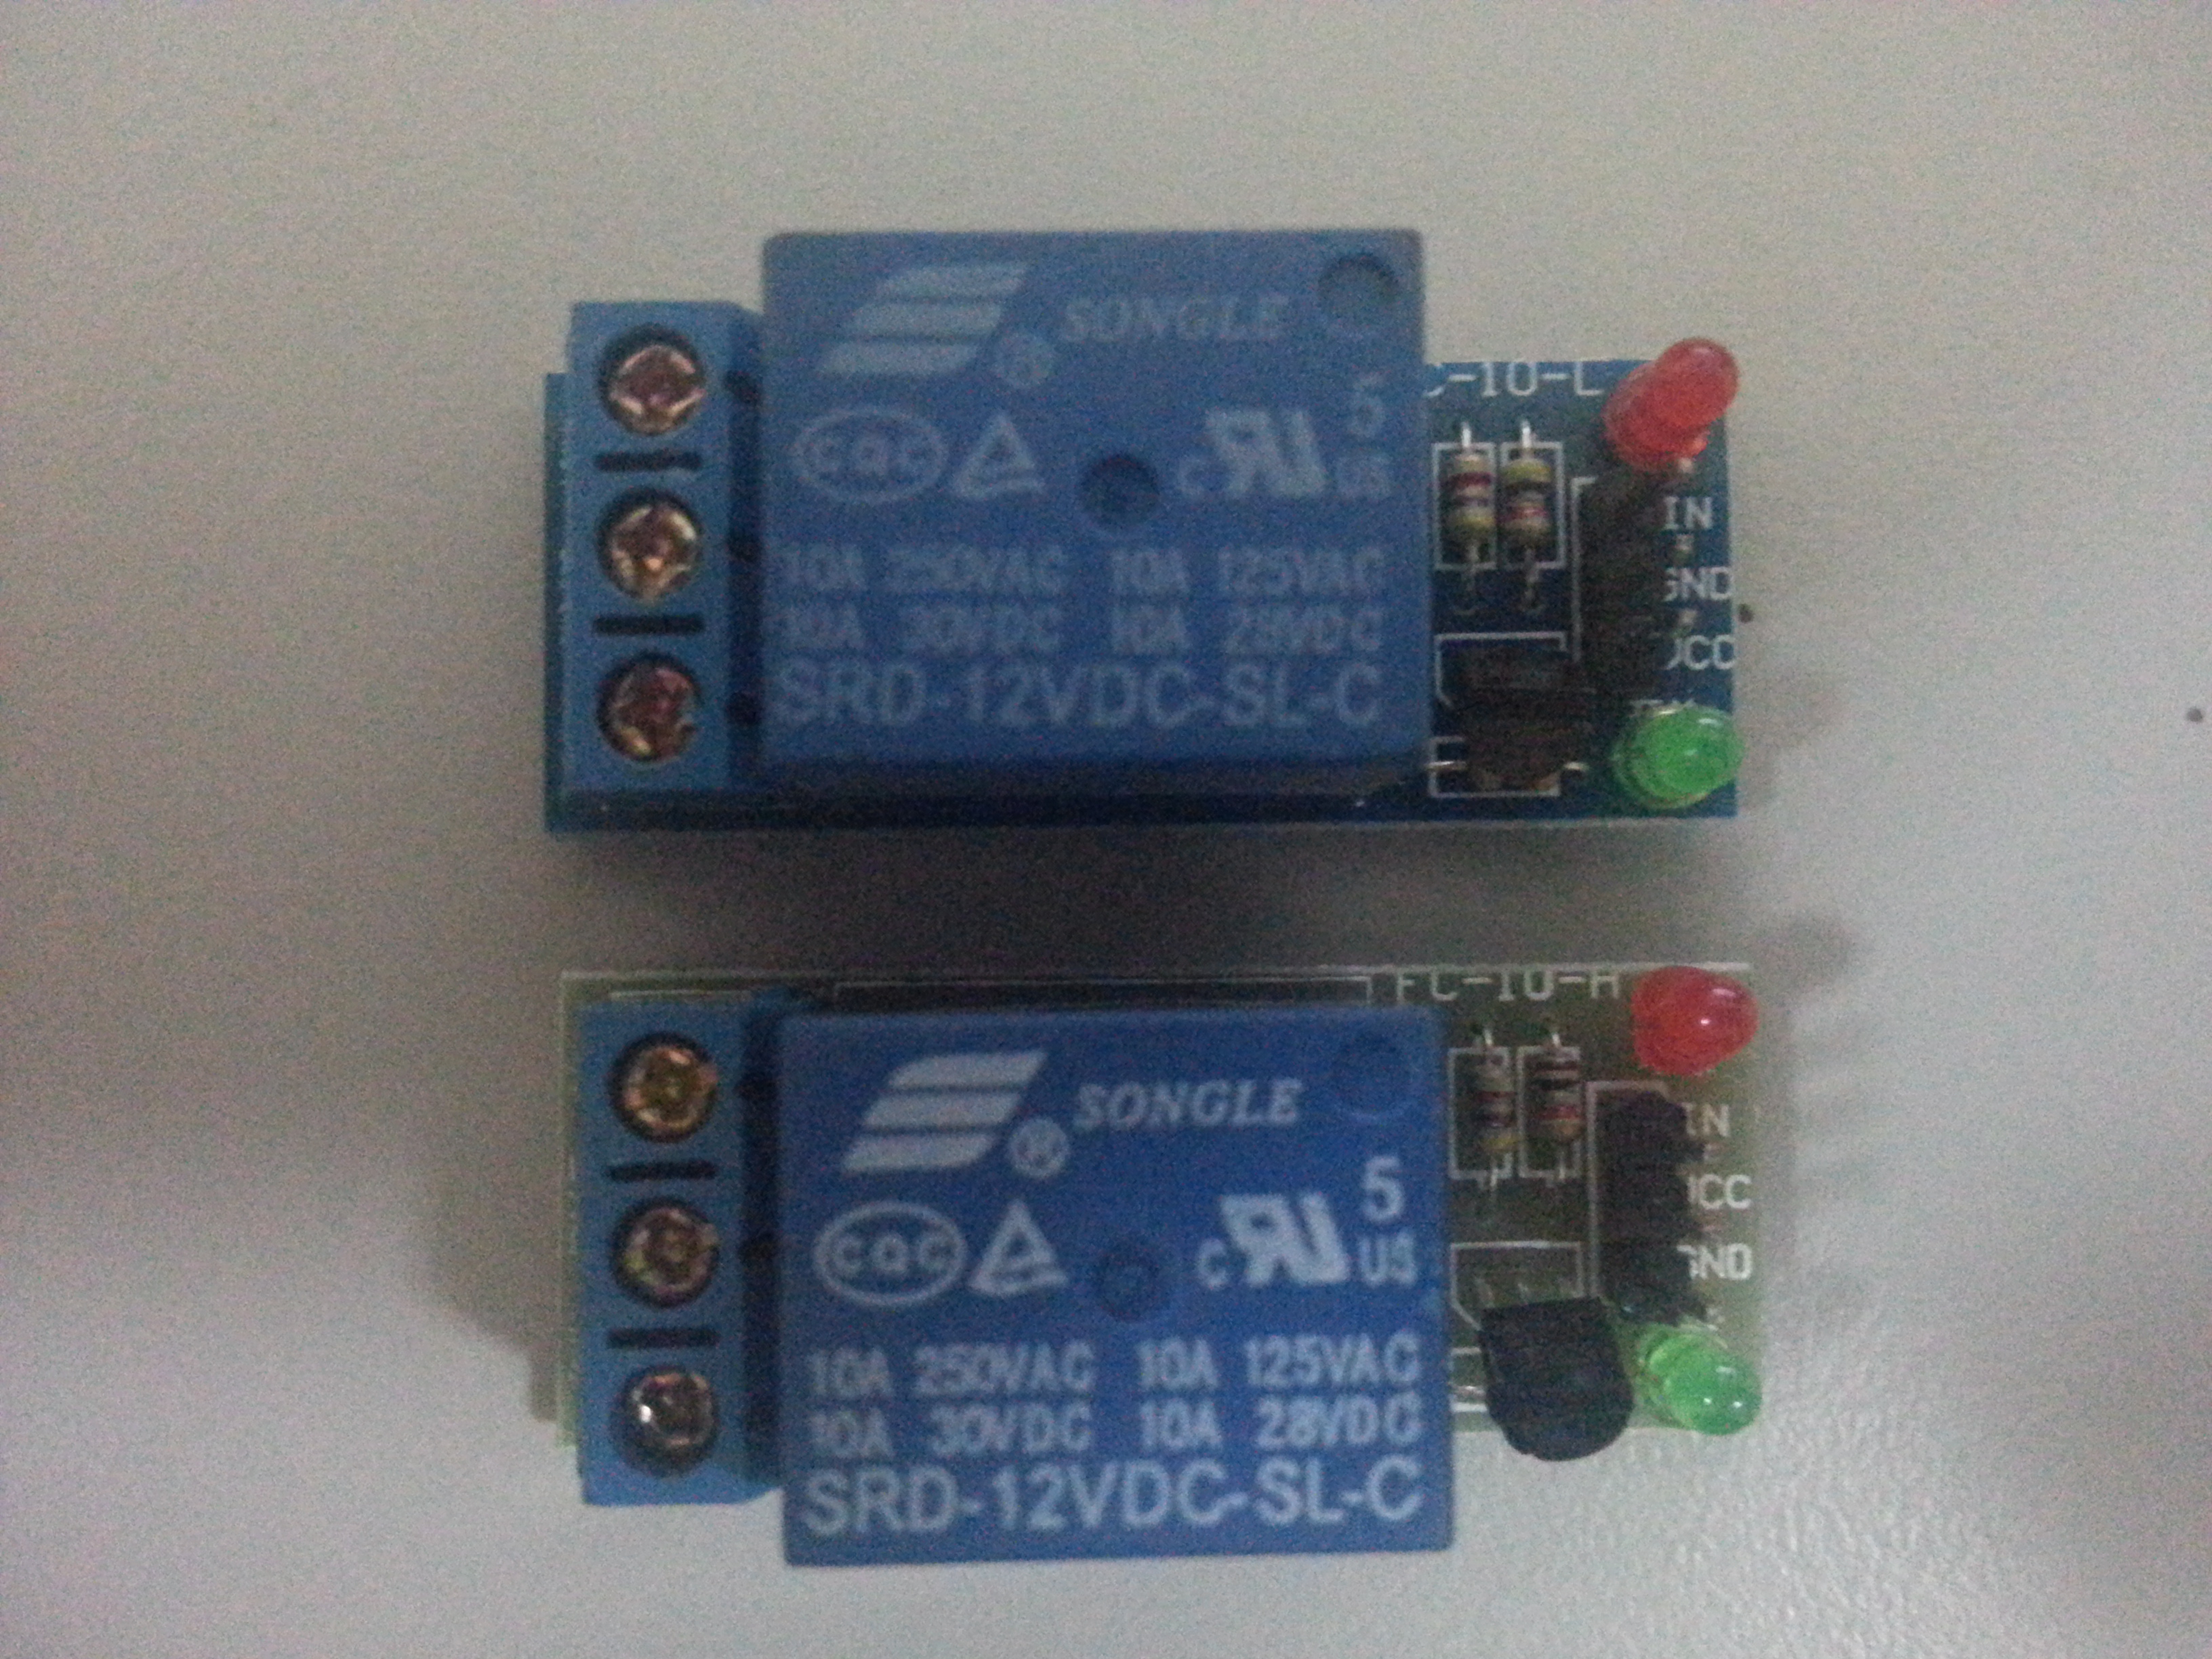 These are the 12V relay which required external power source to control.
How to connect
Normally, a relay has 6 pins, 3 on the A side (IN, VCC, GND) , 3 on the B side (NO, COM, NC) , as shown in the picture below. A side connect to your arduino board, while the B side connect to the ‘real devices’.
These are the 12V relay which required external power source to control.
How to connect
Normally, a relay has 6 pins, 3 on the A side (IN, VCC, GND) , 3 on the B side (NO, COM, NC) , as shown in the picture below. A side connect to your arduino board, while the B side connect to the ‘real devices’.
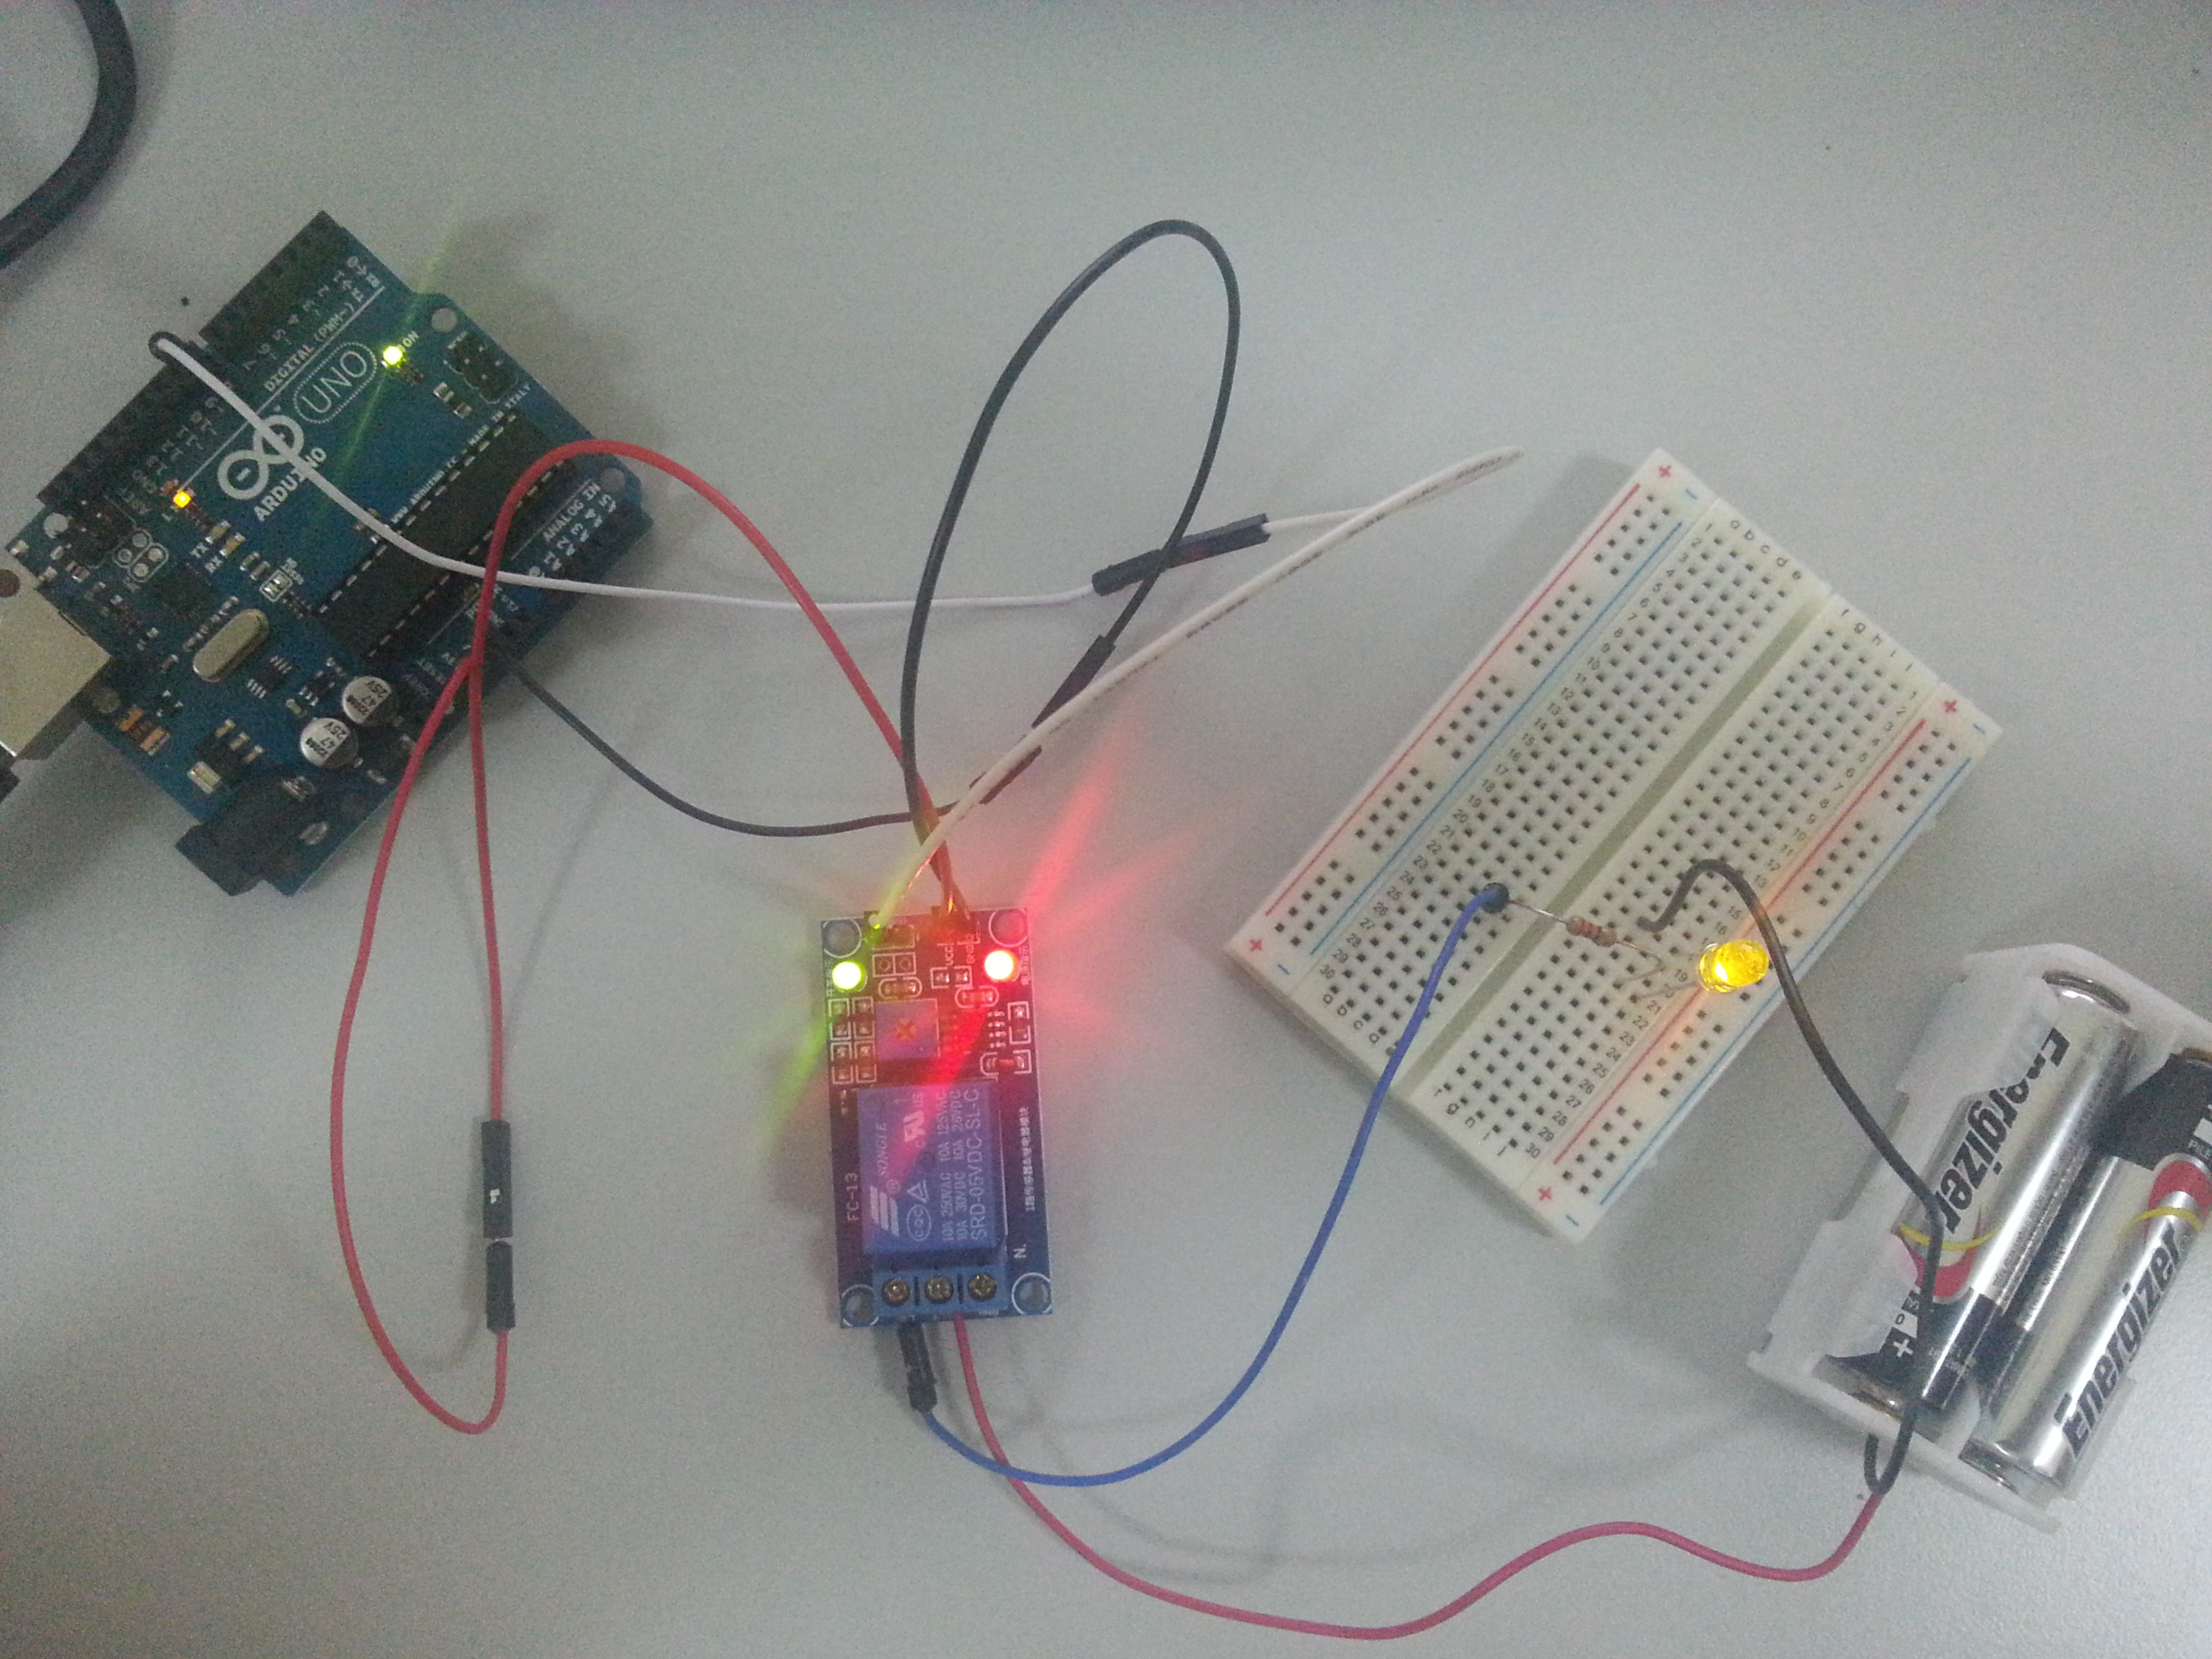
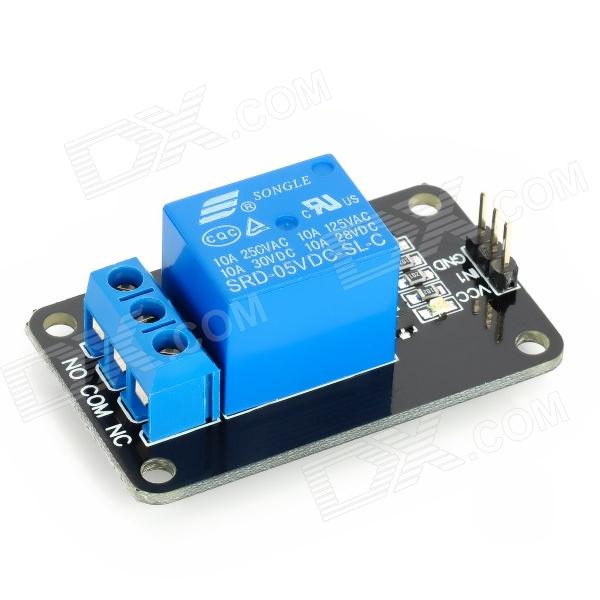 For testing, we always start connecting the A side. VCC to your 5V power output pin, GND to GND pin, while IN to your Digital Output pin. Like this circuit:
 Then, load the following code to test:
|
1 2 3 4 5 6 7 8 9 10 11 12 13 14 |
int Relay = 8; void setup() { pinMode(Relay, OUTPUT); } void loop() { digitalWrite(Relay, HIGH); // turn on relay delay(2000); digitalWrite(Relay, LOW); // turn off relay delay(2000); } |
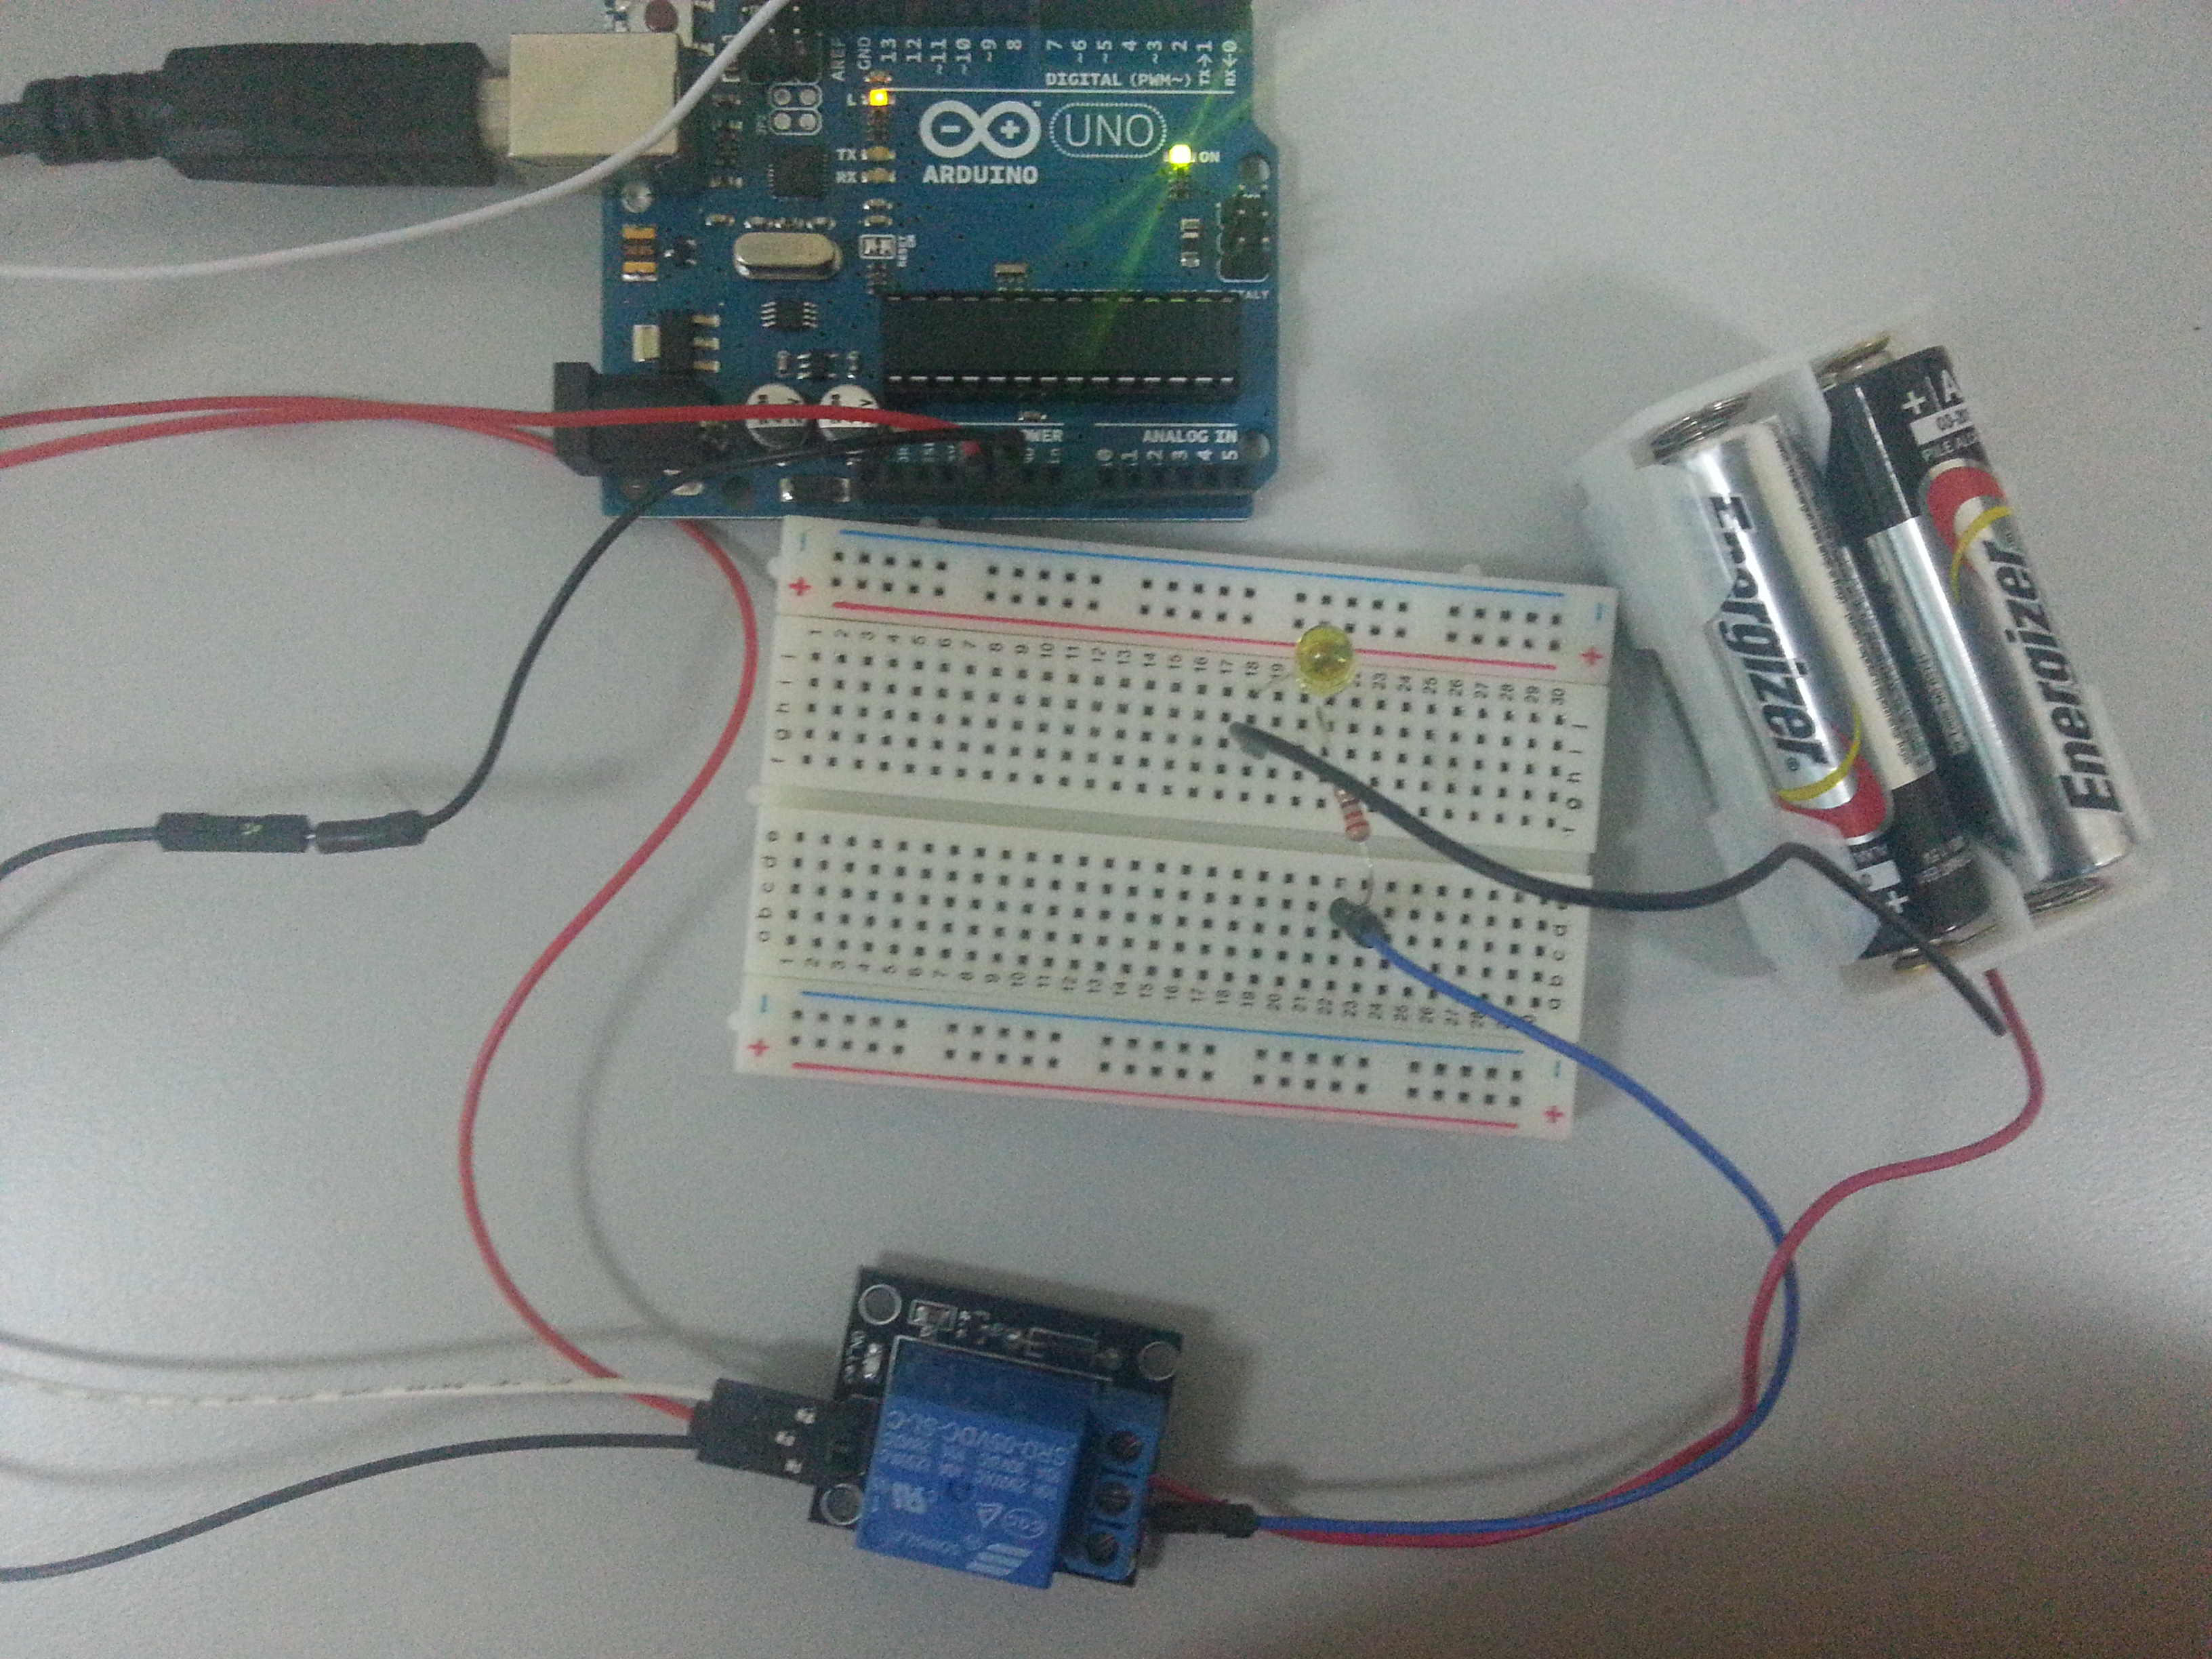
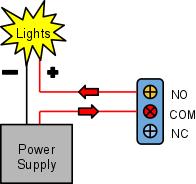 The full circuit would be:
 Note: connect a resistor to your LED as 6V battery could be too large for it to handle.
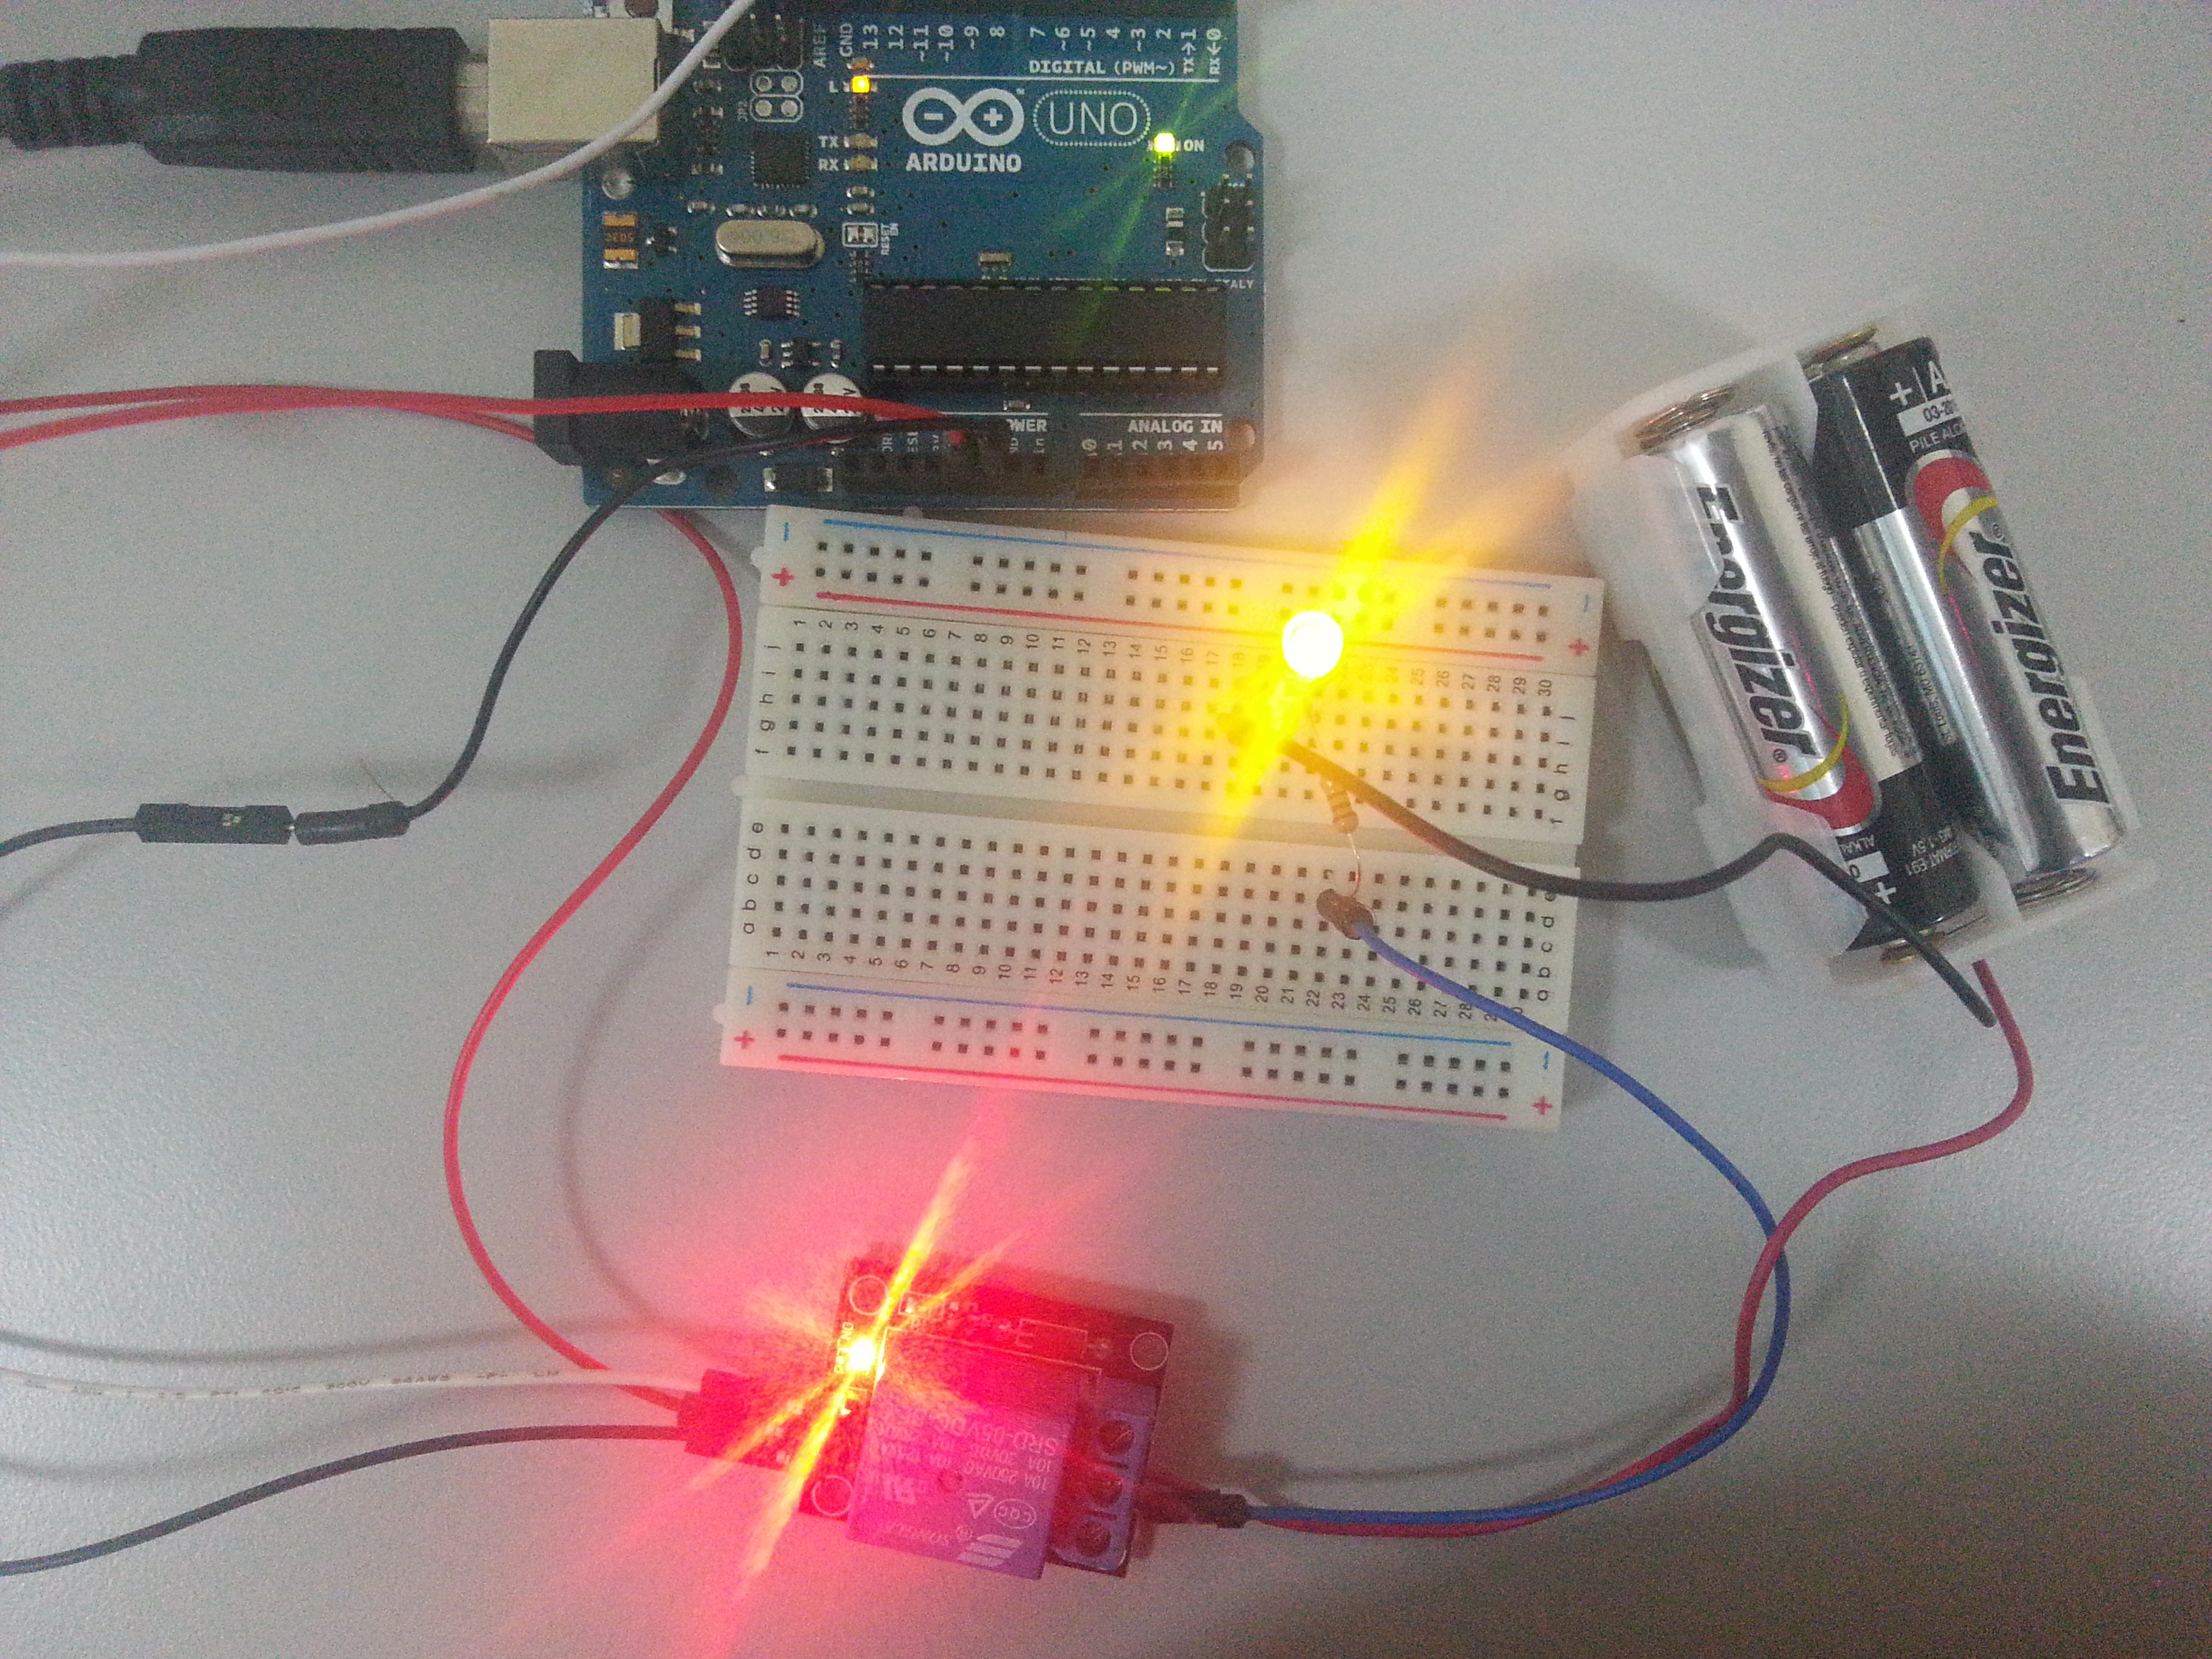
Your LED on/off is now control by your relay.
Chinese References
Most products sellings on dx.com sourced from china and so their components have chinese writing character. It’s not too hard to read them. The following table helps:
Note: connect a resistor to your LED as 6V battery could be too large for it to handle.
Your LED on/off is now control by your relay.
Chinese References
Most products sellings on dx.com sourced from china and so their components have chinese writing character. It’s not too hard to read them. The following table helps:
- NO – 常开 – where you connect with + of light bulb
- COM – 公共端 – where you plugged + power source in
- NC – 常关 – seldom use