Category Archives: HTML & CSS

Web Hosting

I started my first web hosting with Xoom in 90s and then Geocities. They are both free hosting services. Thanks to hosting company like Lunarpages and Exabytes, I able to afford my own cpanel hosting at reasonable fee as low as RM300 annually. I even subscribed for a reseller plan so I can host multiples sites under one WHM. Now, I am more keen to use cloud services such as Heroku, AWS, Azure and Google Hosting. My recent favorite cloud provider is Digital Ocean. I had tried both Heroku and AWS and they are all charge like utilities bill base on usage, which can be very expensive for my free project. Digital Ocean offered fixed price and somehow I feel the vm are more stable than AWS Ec2 although Amazon S3 are still my all time favorite when come to storing static files. With emerging trend like dns cloudflare, baas parse.com, smtp mandrill… it seems that all infrastructure can be provided as service base (IaaS) and programmer can more focus on coding than setting up server.

Angularjs with Baasbox

Ionic framework for mobile app development use angularJs at its core while baasBox is an open source backend-as-a-services platform (pretty much like parse.com except it allow you to self hosted). I encounter problem when using both together. baasBox provide a javascript framework but it required jquery as dependency. Problem is… when I using baasbox ajax function, its callback fail to access angularJs $scope directly, hence i failed to assign variable to my html. for example, this would fail: Then, I did a little experiment trying to grab baasBox API in raw and prove to be successful: This means I can write an angular javascript sdk for baasBox. That would be a prefect solution but I am running out of time. Then, I think of the possibility to make use of $scope.$apply. This allow me to use back the baasBox jquery base js sdk with angularJs in a straight forward manner. Bingo! It works like a charm now.  

WebSocket Server & Mobile Client

Has been playing around on socket.io  but couldn’t get the client and server code separated. I need the server code running on a pc while the client code is just a static html that I can embed inside phonegap or etc. After hours of struggle, I decided to looks for other library and finally rest on these 2 combination: https://github.com/Worlize/WebSocket-Nodehttps://code.google.com/p/jquery-websocket/ thru Simon’s Hamsphire’s kraken blog Simon wrote a very good article on demonstrating these 2 combination. My article here  further demonstrate how to broadcast the msg to multiple clients and fixed some bugs. Ok, so lets’ do this step by step, server first then only the client.

Server part:

  1. First, you need to have nodejs installed.
  2. Save the above code into websock-server\index.js
  3. Then, in your terminal/cmd, type npm install websocket@1.0.3 to install the nodejs websocket library.
  4. Make sure your port 8080 is not occupied by other program as I am using port 8080 in this example.
  5. Next, in your terminal/cmd, cd into the folder and type node index.js
As you can see, I made some modification to the index.js file:
  • It now do not take in a protocol
  • Able to do broadcast by keeping a list of connected clients
  • Modified on request and close request to support the clients tracking function
  • Instead of parrot back the same msg, it is now broadcasting any sender’s msg to everyone. More like how a chat room behave

Client Part:

For the client part, I going to create 2 interface, one for sending and receiving chat msg (index.htm), another for receiving chat msg only (logger.htm).
  1. You will need to change the Server IP in it into yours (ws://192.168.0.200:8080)
  2. The code is pretty simple, everything is self described.
  3. So now i can open the index.htm and type a msg, and it will appear on the space below the input box, as well as in logger.htm
  4. I can even put index.htm into phonegap (need to provide option for user to enter the Server IP) and it can serve as a ‘controller’ while logger.htm can be modified to be a ‘receiver’
Index.html code   Finally, to save your day, I put up the full source code here at https://github.com/exiang/websock. All the best and have fun!  

Web Socket for Game

My designer students are enthusiastic on using web socket for their interactive base project. However, they do not have the basic networking lesson, hence cant tell the different between UDP and TCP. Most of the tool they picked re TCP base. However, UDP is a better protocol to use, especially when you wanto do realtime action game in multilayer mode that required very low latency. Here is a very detail article on the differences between TCP and UDP. http://blog.artillery.com/2012/06/websocket-performance.html

Android default browser sucks

I am using the Samsung Galaxy s3 v4.1.2 and it used default android stock browser, and for the embedded webview component as well. One major issue i notice is when running javascript, weird things happen. For example, on form submit, i wanto prevent user from double clicking the submission button. Usually, a simple jquery javascript did the job and works well on desktop browser, including the mobile chrome browser, but not in the stock browser. The stock browser just failed to hide the form and show the loading div block, Button are disabled sometime and sometime not. But when I clicked back button, the loading div is displayed. So it seems like when form is submitted, the browser just stop all javascript processing. The best way to ensure submit button is disabled is actually to hide it by coding it in the html (old school method) rather in jquery. However, the previous way works well on a nexus device which used chrome as default browser. It works on ios devices too.

Social Login Button with font awesome & bootstrap

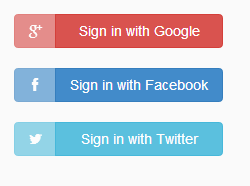
  Traditionallysocial_login_button_02 Social login function thru google, facebook or twitter is common nowadays. Above example required using of external images. Bootstrap & Font awesome version I use Bootstrap framework & Font Awesome to achieve similar result, only with pure HTML & CSS, best for multilingual use-case scenario. With the default button color scheme (primary, info, danger) provided by Bootstrap, it is good enough to support Facebook, Twitter & Google login. If you need more different color style, you will have to extend the default css. bootstrap login The code:  Alternative Other example are such as: http://noizwaves.github.io/bootstrap-social-buttons/

Font Awesome to PNG converter using PHP

Font Awesome gives you scalable vector icons that can instantly be customized — size, color, drop shadow, and anything that can be done with the power of CSS. It’s free and open source, available at http://fortawesome.github.io/Font-Awesome/ It’s very ready to use in HTML: I have created this open source at Github: https://github.com/exiang/php-font-awesome-to-png that helps you mass extract the icons into PNG images. Then, you can use it for your native mobile app development like ios, android and windows phone.
  1. First, download the zip file and extract it to htdocs\php-font-awesome-to-png-master
  2. Make sure your web server have php5 and gd module installed.
  3. We need to download fontawesome-webfont.ttf separately from https://github.com/FortAwesome/Font-Awesome/tree/master/fonts. Drop it into the same directory as the php code.
  4. You may run the php code from browser or console.
Modify the generate.php By default, php-font-awesome-to-png generate png images at the following size as this code shows: It’s a PHP array, just modify at your will to add-in or deduct any size. As for colors, it is define as PHP array too: Please note not to use 255,0,255 as it is reserved color for background trimming. Modify the icons.data.php icons.data.php is a mapping between the character code used by fontawesome into the outputted png file name. Edit it if necessary, for example when fontawesome added new icon. You will need to refer to fontawesome css file. http://netdna.bootstrapcdn.com/font-awesome/4.0.3/css/font-awesome.css For example, glass icon in css is: so the mapping in our php code would be like: Now, we are done 😉 Happy using the converter and please help the project by contribute your latest up to date icons.data.php that sync with fontawesome. TQ.